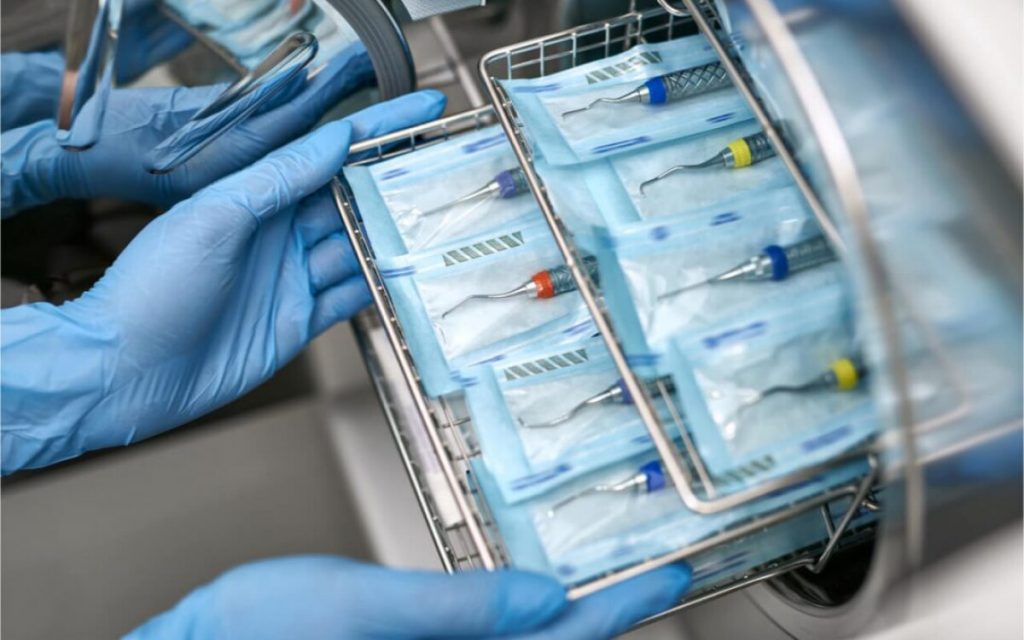
How to deal with the wet bag phenomenon in the sterilization bag during the sterilization process
As we all know, pressure steam sterilization is one of the most reliable and widely used sterilization technologies recognized in the world. It has the characteristics of fast sterilization speed, reliable effect, high temperature, strong penetrating power, environmental protection, safety and non-toxicity, and low cost. Etc.
However, during the disinfection and sterilization process, the sterilization package may become “wet package” or “open package”, causing the sterility barrier to be destroyed. What’s going on? Can it be avoided?
After the sterilization package has been sterilized and cooled, it can be seen with the naked eye: the surface of the sterilization package feels moist to the touch; there are traces of water on the chemical indicator tape; and there are water beads inside the sterilization package.

Causes of wet packs
①The sterilizer itself is faulty;
② Before sterilization, the packaging material is damp or the items are not completely dry;
③Irregular packaging and unreasonable loading;
④The cooling time is insufficient and the cooling method is incorrect.
In addition to “wet bags” caused by the failure of the sterilizer itself, standardizing the sterilization process can effectively reduce the occurrence of wet bags.
Prevention of sterilization bag wet packs
Standardized packaging
Too much, too dense, stacked, overweight, and unused transfer baskets for metal instruments in the bag are not conducive to steam penetration, leading to the formation of condensation water. Packaging should be standardized as required, and attention should be paid to the reasonable use of absorbent paper, liners and protective covers for sharp instruments.
Canonical loading
① When loading, try to put instruments, utensils and items with similar sterilization parameters into the same batch for sterilization;
② When mixed loading, textile items are placed on the upper level and placed vertically, and metal instruments are placed on the lower level;
③ Use special sterilization racks or baskets to load sterilization items, leaving gaps between sterilization packages;
④Single packages should be placed vertically in special baskets and should not be stacked together;
⑤Place paper bags and paper-plastic packaging items on their sides with the paper side facing down. Do not stack them on top of each other;
⑥Do not let the packaging touch the wall of the sterilizer chamber;
⑦Put surgical instrument packages and hard containers flat; place basins, plates, bowls and other items at an angle; place glass bottles and other utensils without holes at the bottom upside down or on their sides.
Standard cooling
After being unloaded and taken out of the sterilizer, all items, including hard sterilization containers, should be placed on the sterilizer trolley until they drop to the appropriate temperature. The cooling time is >30 minutes.
Open the package
The tape opening of the sterilization package after sterilization leads to “opening”, which is mainly related to the huge mechanical force exerted on the package during the sterilization process.
The sterilization cycle is generally divided into three stages, taking pre-vacuum/pulsating vacuum as an example:
The first stage, pulsation;
the second stage, sterilization exposure;
The third stage is drying and emptying.
In the first stage, the sterilizer will perform repeated vacuuming and steam injection operations to achieve the replacement of cold air with water vapor. How much mechanical force does the sterilization package have to withstand during this process?
Under normal circumstances, the pressure inside and outside the sterilization package is 1 atmosphere, but when the vacuum is applied, the pressure outside the package drops to almost 0, and the sterilization package will expand rapidly; during the sterilization exposure stage, when the temperature rises to 134 degrees When the pressure outside the bag is 3 atmospheres, the sterilization bag will be extremely compressed. It can be seen that the packaging material and instruction tape of the sterilization package are under great pressure.
Prevention of unpacking
Suitable packetization method
Different packaging methods should be used for packages of different sizes.
For smaller sterilization packages, use 2 tapes of 10 cm each to seal the package.
For larger and heavier sterilization packages, use “cross-shaped” or “tic-tac-toe” packages.
Irregular items such as basins, plates, and bowls should be reinforced at the corners with tape.
Press indication tape
A qualified pressure steam sterilization indication tape can maintain good stickiness before and after sterilization. At the same time, most of the backing adhesive of the indication tape is “pressure-sensitive adhesive”. A slight press can strengthen the stickiness after sterilization. Not easy to open the package.
Amity Pressure Steam Sterilization Indicator Tape is firmly adhered and can be removed without leaving any adhesive residue; it is resistant to high temperatures and will not fall off or spread during the sterilization process; the indicator has stable performance and is easy to judge the color before and after sterilization; it can be done directly on the tape Relevant records, written smoothly.
Pressure steam sterilization indicator tape is often used in conjunction with indicator labels and indicator cards.
Stable performance, simple and accurate, easy to judge
Easy to tear off, firmly adhered, not easy to warp, resistant to high temperature and humidity
Economical and environmentally friendly, the material is tear-resistant, waterproof, and durable
Provides a variety of formats, and can print one-dimensional codes and two-dimensional codes for traceability inquiries
The integrated design of the traceability label and color-changing indicator strip eliminates the need for additional indicator cards.
